API Management? Did you say “API Management?”
Software
application development models are evolutionary things. New
technologies are always being created and require new approaches. It’s
frequently the case today, that a service oriented architecture (SOA)
model is used and that the end product is a software service that can be
used by applications. The explosion in growth of mobile devices has
only accelerated this trend. Every new mobile phone sold is another
platform onto which applications are deployed. These applications are
often built from services provided from multiple sources. The
applications often consume these services through their APIs.
OK, that’s all interesting, but why does this matter?
Here’s why:
If
you are providing a service, you’d probably like to receive payment
when it’s used by an application. For example, let’s say that you’ve
spent months creating a new service that provides incredibly accurate
and timely driving directions. You can imagine every mobile phone GPS
app making use of your service someday. That is, however, assuming that
you can find a way to enforce a contract on consumers of the API and
provide them with a service level agreement (SLA). Also, you have to
find a way to actually track consumers’ use of the API so that you can
actually enforce that SLA. Finally, you have to have the means to update
a service and publish new versions of services.
Likewise,
if you are consuming a service, for example, if you want to build the
killer app that will use that cool new mapping service, you have to have
the means to find the API, identify the API’s endpoint, and register
your usage of the API with its provider.
The approach that is followed to fulfill both service providers’ and consumers’ needs is...API Management.
JBoss apiman 1.0
apiman is JBoss’ open source API Management system. apiman fulfills service API providers’ and consumers’ needs by implementing:
- API Manager - The API Manager provides an easy way for API/service providers to use a web UI to define service contracts for their APIs, apply these contracts across multiple APIs, and control role-based user access and API versioning. These contracts can govern access to services and limits on the rate at which consumers can access services. The same UI enables API consumers to easily locate and access APIs.
- API Gateway - The gateway applies the service contract policies of API Management by enforcing at runtime the rules defined in the contracts and tracking the service API consumers’ use of the APIs for every request made to the services. The way that the API Gateway works is that the consumer of the service accesses the service through a URL that designates the API Gateway as a proxy for the service. If the policies defined to govern access to the service (see a later section in this post for a discussion of apiman polices), the API Gateway then proxies requests to the service’s backend API implementation.
The
best way to understand API Management with apiman is to see it in
action. In this post, we’ll install apiman 1.0, configure an API with
contracts through the API Manager, and watch the API Gateway control
access to the API and track its use.
Prerequisites
We
don’t need very much to run apiman out of the box. Before we install
apiman, you’ll have to have Java (version 1.7 or newer) installed on
your system. You’ll also need to git and maven installed to be able to
build the example service that we’ll use.
A
note on software versions: In this post we’ll use the latest available
version of apiman as of December 2014. As if this writing, version 1.0
of apiman was just released (December 2014). Depending on the versions
of software that you use, some screen displays may look a bit different.
Getting apiman
Like
all JBoss software, installation of apiman is simple. First, you will
need an application server on which to install and run apiman. We’ll use
the open source JBoss WildFly server release 8.2
(http://www.wildfly.org/). To make things easier, apiman includes a
pointer to JBoss WildFly on its download page here: http://www.apiman.io/latest/download.html
To install WildFly, simply download http://download.jboss.org/wildfly/8.2.0.Final/wildfly-8.2.0.Final.zip and unzip the file into the directory in which you want to run the sever.
Then,
download the apiman 1.0 WildFly overlay zip file inside the directory
that was created when you un-zipped the WildFly download. The apiman 1.0
WildFly overlay zip file is available here: http://downloads.jboss.org/overlord/apiman/1.0.0.Final/apiman-distro-wildfly8-1.0.0.Final-overlay.zip
The commands that you will execute will look something like this:
mkdir apiman
cd apiman
unzip wildfly-8.2.0.Final.zip
unzip -o apiman-distro-wildfly8-1.0.0.Final-overlay.zip -d wildfly-8.2.0.Final
Then, to start the server, execute these commands:
cd wildfly-8.2.0.Final
./bin/standalone.sh -c standalone-apiman.xml
The
server will write logging messages to the screen. When you see some
messages that look like this, you’ll know that the server is up and
running with apiman installed:
13:57:03,229
INFO [org.jboss.as.server] (ServerService Thread Pool -- 29)
JBAS018559: Deployed "apiman-ds.xml" (runtime-name : "apiman-ds.xml")
13:57:03,261
INFO [org.jboss.as] (Controller Boot Thread) JBAS015961: Http
management interface listening on http://127.0.0.1:9990/management
13:57:03,262 INFO [org.jboss.as] (Controller Boot Thread) JBAS015951: Admin console listening on http://127.0.0.1:9990
13:57:03,262
INFO [org.jboss.as] (Controller Boot Thread) JBAS015874: WildFly
8.2.0.Final "Tweek" started in 5518ms - Started 754 of 858 services (171
services are lazy, passive or on-demand)
If
this were a production server, the first thing that we’d do is to
change the OOTB default admin username and/or password. apiman is
configured by default to use JBoss KeyCloak (http://keycloak.jboss.org/)
for password security. Also, the default database used by apiman to
store contract and service information is the H2 database. For a
production server, you’d want to reconfigure this to use a production
database. Note: apiman includes DDLs for both MySQL and PostgreSQL.
For the purposes of our demo, we’ll keep things simple and use the default configuration.
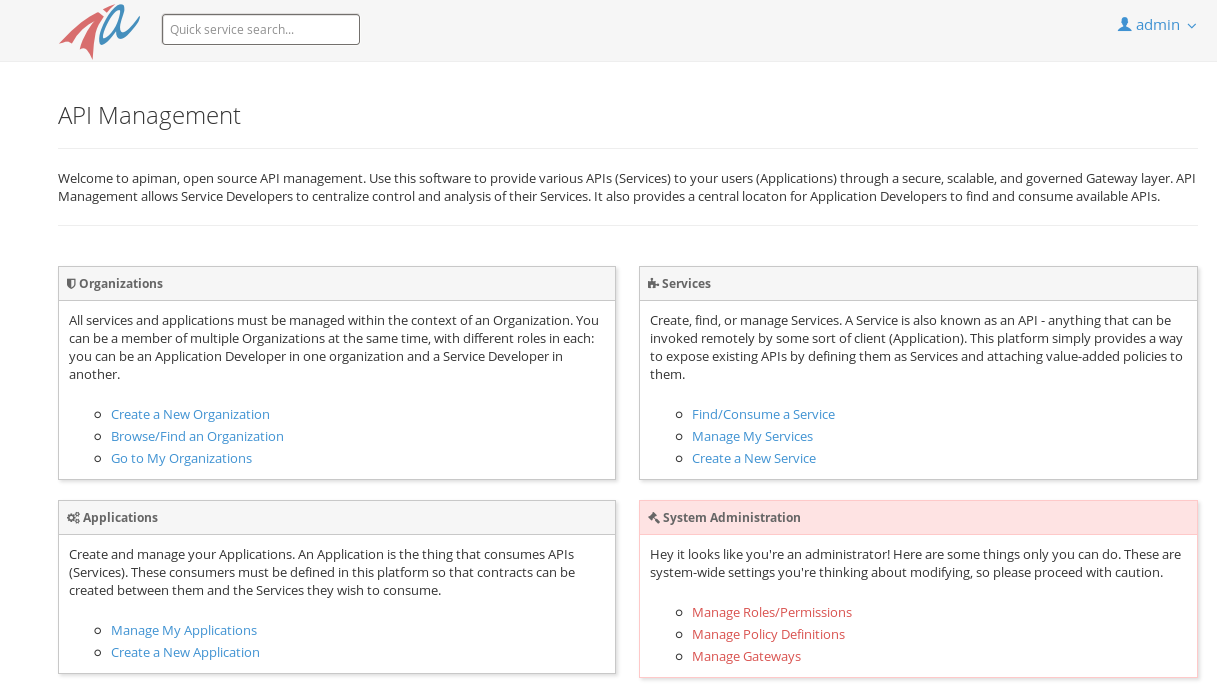
To access apiman’s API Manager UI, go to: http://localhost:8080/apiman-manager, and log in. The admin user account that we’ll use has a username of “admin” and a password of “admin123!”
You should see a screen that looks like this:
Before
we start using apiman, let’s take a look at how apiman defines how
services and the meta data on which they depend are organized.
Policies, Plans, and Organizations
apiman uses a hierarchical data model that consists of these elements: Polices, Plans, and Organizations:
Policies
Policies
are at the lowest level of the data model, and they are the basis on
which the higher level elements of the data model are built. A policy
defines an action that is performed by the API Gateway at runtime.
Everything defined in the API Manager UI is there to enable apiman to
apply policies to requests made to services.
When
a request to a service is made, apiman creates a chain of policies to
be applied to that request. apiman policy chains define a specific
sequence order in which the policies defined in the API Manager UI are
applied to service requests.
The sequence in which incoming service requests have policies applied is:
- First, at the application level. In apiman, an application is contracted to use one or more services.
- Second, at the plan level. In apiman, policies are organized into groups called plans. (We’ll discuss plans in the next section of this post.)
- Third, at the individual service level.
What
happens is that when a service request is received by the API Gateway
at runtime, the policy chain is applied in the order of application,
plan, and service. If no failures, such as a rate counter being
exceeded, occur, the API Gateway sends the request to the service’s
backend API implementation. As we mentioned earlier in this post, the
API Gateway acts as a proxy for the service:
Next,
when the API Gateway receives a response from the service’s backend
implementation, the policy chain is applied again, but this time in the reverse
order. The service policies are applied first, then the plan policies,
and finally the application policies. If no failures occur, then the
service response is sent back to the consumer of the service.
By applying the policy chain twice, both for the originating incoming request and the resulting response, apiman allows policy implementations two opportunities to provide management functionality during the lifecycle. The following diagram illustrates this two-way approach to applying policies:
Plans
In
apiman, a “plan” is a set policies that together define the level of
service that apiman provides for service. Plans enable apiman users to
define multiple different levels of service for their APIs, based on
policies. It’s common to define different plans for the same service,
where the differences depend on configuration options. For example, a
group or company may offer both a “gold” and “silver” plan for the same
service. The gold plan may be more expensive than the silver plan, but
it may offer a higher level of service requests in a given (and
configurable) time period.
Organizations
The “organization” is at top level of the apiman data model.
An
organization contains and manages all elements used by a company,
university, group inside a company, etc. for API management with apiman.
All plans, services, applications, and users for a group are defined in
an apiman organization. In this way, an organization acts as a
container of other elements. Users must be associated with an
organization before they can use apiman to create or consume services.
apiman implements role-based access controls for users. The role
assigned to a user defines the actions that a user can perform and the
elements that a user can manage.
Before
we can define a service, the policies that govern how it is accessed,
the users who will be able to access, and the organizations that will
create and consume it, we need a service and a client to access that
service. Luckily, creating the service and deploying it to our WildFly
server, and accessing it through a client are easy.
Getting and Building and Deploying the Example Service
The
source code for the example service is contained in a git repo
(http://git-scm.com) hosted at github (https://github.com/apiman). To
download a copy of the example service, navigate to the directory in
which you want to build the service and execute this git command:
As the source code is downloading, you'll see output that looks like this:
git clone git@github.com:apiman/apiman-quickstarts.git
Initialized empty Git repository in /tmp/tmp/apiman-quickstarts/.git/
remote: Counting objects: 104, done.
remote: Total 104 (delta 0), reused 0 (delta 0)
Receiving objects: 100% (104/104), 18.16 KiB, done.
Resolving deltas: 100% (40/40), done.
And, after the download is complete, you'll see a populated directory tree that looks like this:
└── apiman-quickstarts
├── echo-service
│ ├── pom.xml
│ ├── README.md
│ └── src
│ └── main
│ ├── java
│ │ └── io
│ │ └── apiman
│ │ └── quickstarts
│ │ └── echo
│ │ ├── EchoResponse.java
│ │ └── EchoServlet.java
│ └── webapp
│ └── WEB-INF
│ ├── jboss-web.xml
│ └── web.xml
├── LICENSE
├── pom.xml
├── README.md
├── release.sh
└── src
└── main
└── assembly
└── dist.xml
As
we mentioned earlier in the post, the example service is very simple.
The only action that the service performs is to echo back in responses
the meta data in the REST
(http://en.wikipedia.org/wiki/Representational_state_transfer) requests
that it receives.
Maven
is used to build the service. To build the service into a deployable
.war file, navigate to the directory into which you downloaded the
service example:
cd apiman-quickstarts/echo-service
And then execute this maven command:
mvn package
As the service is being built into a .war file, you'll see output that looks like this:
[INFO] Scanning for projects...
[INFO]
[INFO]
Using the builder
org.apache.maven.lifecycle.internal.builder.singlethreaded.SingleThreadedBuilder
with a thread count of 1
[INFO]
[INFO] ------------------------------------------------------------------------
[INFO] Building apiman-quickstarts-echo-service 1.0.1-SNAPSHOT
[INFO] ------------------------------------------------------------------------
[INFO]
[INFO] --- maven-resources-plugin:2.6:resources (default-resources) @ apiman-quickstarts-echo-service ---
[INFO] Using 'UTF-8' encoding to copy filtered resources.
[INFO] skip non existing resourceDirectory /jboss/local/redhat_git/apiman-quickstarts/echo-service/src/main/resources
[INFO]
[INFO] --- maven-compiler-plugin:2.5.1:compile (default-compile) @ apiman-quickstarts-echo-service ---
[INFO] Compiling 2 source files to /jboss/local/redhat_git/apiman-quickstarts/echo-service/target/classes
[INFO]
[INFO] --- maven-resources-plugin:2.6:testResources (default-testResources) @ apiman-quickstarts-echo-service ---
[INFO] Using 'UTF-8' encoding to copy filtered resources.
[INFO] skip non existing resourceDirectory /jboss/local/redhat_git/apiman-quickstarts/echo-service/src/test/resources
[INFO]
[INFO] --- maven-compiler-plugin:2.5.1:testCompile (default-testCompile) @ apiman-quickstarts-echo-service ---
[INFO] No sources to compile
[INFO]
[INFO] --- maven-surefire-plugin:2.12.4:test (default-test) @ apiman-quickstarts-echo-service ---
[INFO] No tests to run.
[INFO]
[INFO] --- maven-war-plugin:2.2:war (default-war) @ apiman-quickstarts-echo-service ---
[INFO] Packaging webapp
[INFO]
Assembling webapp [apiman-quickstarts-echo-service] in
[/jboss/local/redhat_git/apiman-quickstarts/echo-service/target/apiman-quickstarts-echo-service-1.0.1-SNAPSHOT]
[INFO] Processing war project
[INFO] Copying webapp resources [/jboss/local/redhat_git/apiman-quickstarts/echo-service/src/main/webapp]
[INFO] Webapp assembled in [23 msecs]
[INFO]
Building war:
/jboss/local/redhat_git/apiman-quickstarts/echo-service/target/apiman-quickstarts-echo-service-1.0.1-SNAPSHOT.war
[INFO] WEB-INF/web.xml already added, skipping
[INFO] ------------------------------------------------------------------------
[INFO] BUILD SUCCESS
[INFO] ------------------------------------------------------------------------
[INFO] Total time: 1.184 s
[INFO] Finished at: 2014-12-26T16:11:19-05:00
[INFO] Final Memory: 14M/295M
[INFO] ------------------------------------------------------------------------
If you look closely, near the end of the output, you'll see the location of the .war file:
/jboss/local/redhat_git/apiman-quickstarts/echo-service/target/apiman-quickstarts-echo-service-1.0.1-SNAPSHOT.war
To
deploy the service, we can copy the .war file to our WildFly server's
"deployments" directory. After you copy the service's .war file to the
deployments directory, you'll see output like this generated by the
WildFly server:
16:54:44,313
INFO [org.jboss.as.server.deployment] (MSC service thread 1-7)
JBAS015876: Starting deployment of
"apiman-quickstarts-echo-service-1.0.1-SNAPSHOT.war" (runtime-name:
"apiman-quickstarts-echo-service-1.0.1-SNAPSHOT.war")
16:54:44,397 INFO [org.wildfly.extension.undertow] (MSC service thread 1-16) JBAS017534: Registered web context: /apiman-echo
16:54:44,455
INFO [org.jboss.as.server] (DeploymentScanner-threads - 1) JBAS018559:
Deployed "apiman-quickstarts-echo-service-1.0.1-SNAPSHOT.war"
(runtime-name : "apiman-quickstarts-echo-service-1.0.1-SNAPSHOT.war")
Make special note of this line of output:
16:54:44,397 INFO [org.wildfly.extension.undertow] (MSC service thread 1-16) JBAS017534: Registered web context: /apiman-echo
This output indicates that the URL of the deployed example service is:
Remember,
however, that this is the URL of the deployed example service if we
access it directly. We'll refer to this as the "unmanaged service" as we
are able to connect to the service directly, without going through the
API Gateway. The URL to access the service through the API Gateway
("the managed service") at runtime will be different.
Now that our example service is installed, it’s time to install and configure our client to access the server.
Accessing the Example Service Through a Client
There
are a lot of options available when it comes to what we can use for a
client to access our service. We’ll keep the client simple so that we
can keep our focus on apiman and simply install a REST client into the
FireFox browser. The REST Client FireFox add-on (http://restclient.net/) is available here: https://addons.mozilla.org/en-US/firefox/addon/restclient/versions/2.0.3
After
you install the client into FireFox, you can access the deployed
service using the URL that we just defined. If you execute a GET
command, you’ll see output that looks like this:

Now
that our example service is built, deployed and running, it’s time to
create the organizations for the service provider and the service
consumer. The differences between the requirements of the two
organizations will be evident in their apiman configuration properties.
Creating Users for the Service Provider and Consumer
Before
we create the organizations, we have to create a user for each
organization. We'll start by creating the service provider user. To do
this, logout from the admin account in the API Manager UI. The login
dialog will then be displayed.
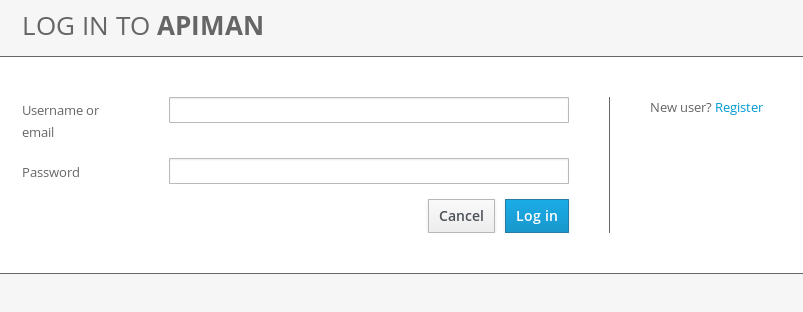
Select the "New user" Option and register the service provider user:

Then, logout and repeat the process to register a new application developer user too:
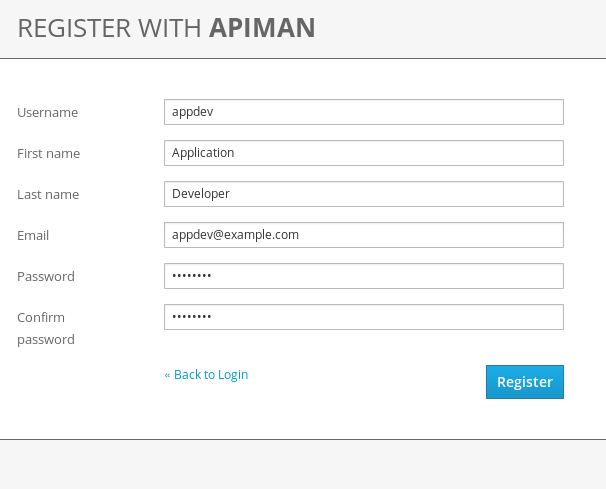
Now that the new users are registered we can create the organizations.
Creating the Service Producer Organization
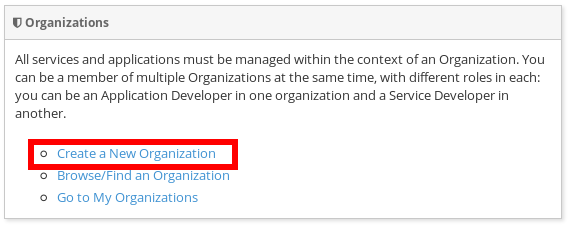
To
create the service producer organization, log back into the API Manager
UI as the servprov user and select “Create a new Organization”:
Select a name and description for the organization, and press “Create Organization”:
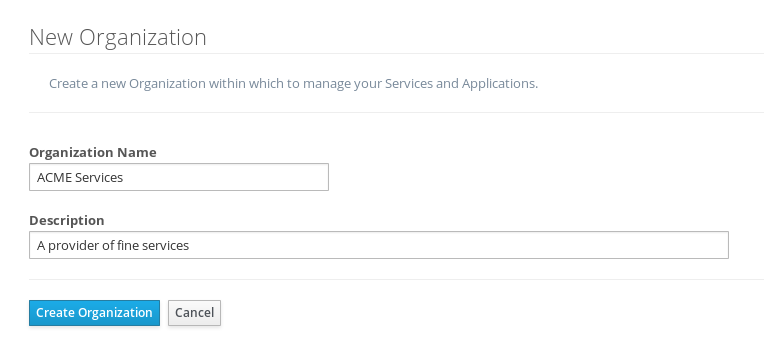
And, here’s our organization:

Note
that in a production environment, users would request membership in an
organization. The approval process for accepting new members into an
organization would follow the organization's workflow, but this would be
handled outside of the API Manager. For the purposes of our
demonstration, we'll keep things simple.
Configuring the Service, its Policies, and Plans
To
configure the service, we’ll first create a plan to contain the
policies that we want applied by the API Gateway at runtime when
requests to the service are made. To create a new plan, select the
“Plans” tab. We’ll create a “gold” plan:
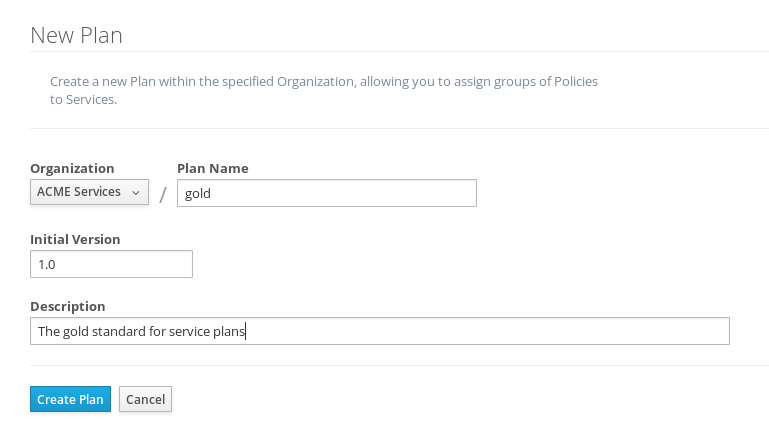
Once the plan is created, we will add policies to it:
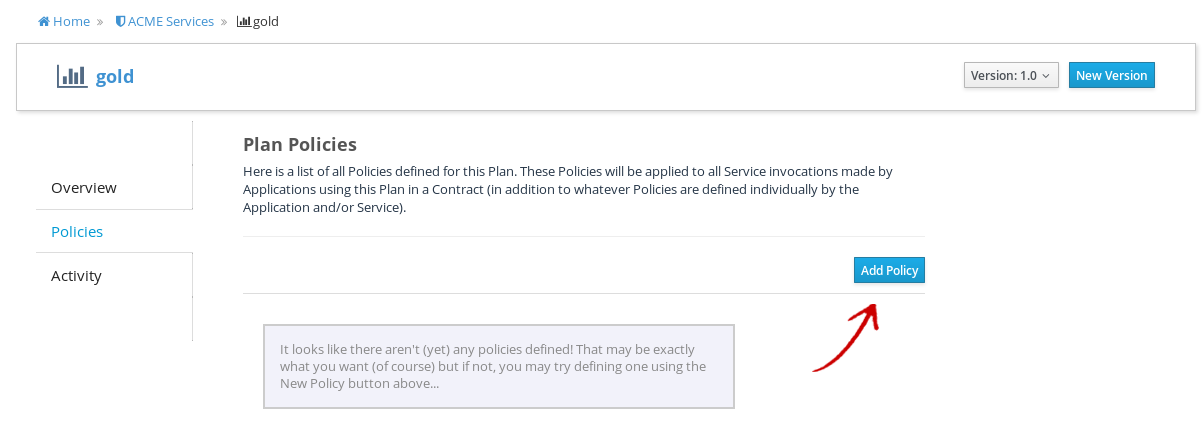
apiman
provides several OOTB policies. Since we want to be able to demonstrate
a policy being applied, we’ll select a Rate Limiting Policy, and set
its limit to a very low level. If our service receives more than 10
requests in a day, the policy should block all subsequent requests. So
much for a “gold” level of service!
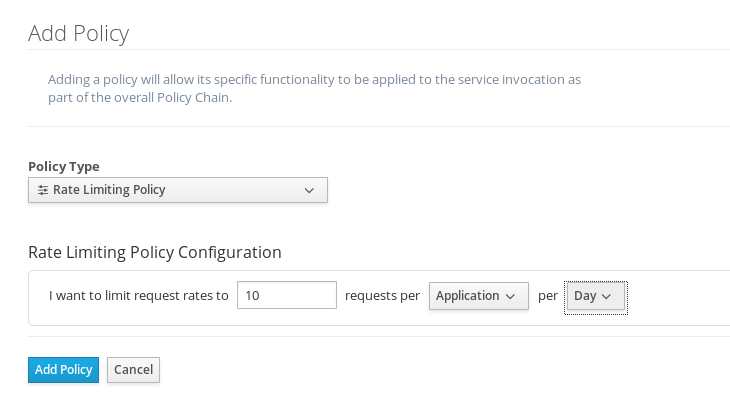
After we create the policy and add it to the plan, we have to lock the plan:

And, here is the finished, and locked plan:
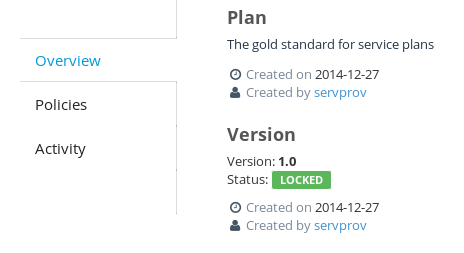
At
this point, additional plans can be defined for the service. We’ll also
create a “silver” plan, that will offer a lower level of service (i.e.,
a request rate limit lower than 10 per day) than the gold plan. Since
the process to create this silver plan is identical to that of the gold
plan, we’ll skip the screenshots.
Now that the two plans are complete and locked, it’s time to define the service.
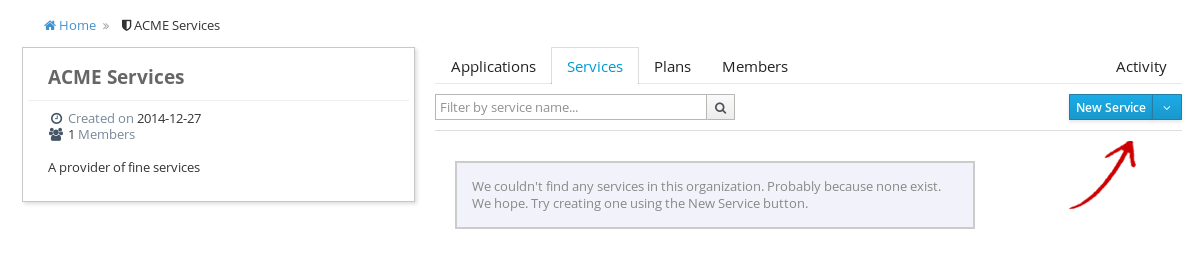
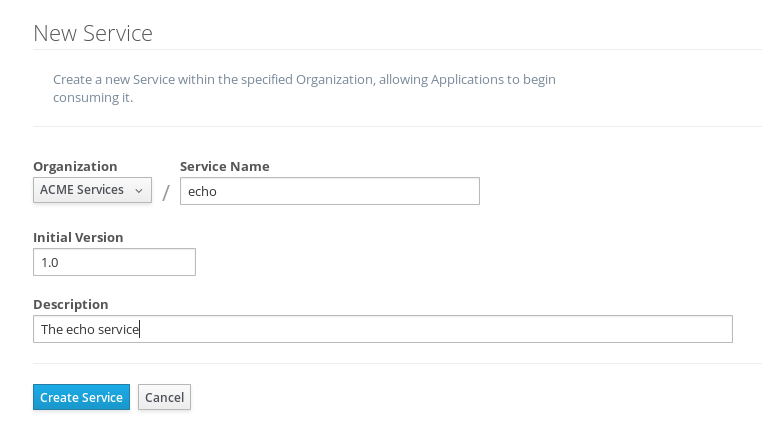
We’ll
give the service an appropriate name, so that providers and consumers
alike will be able to run a query in the API Manager to find it.
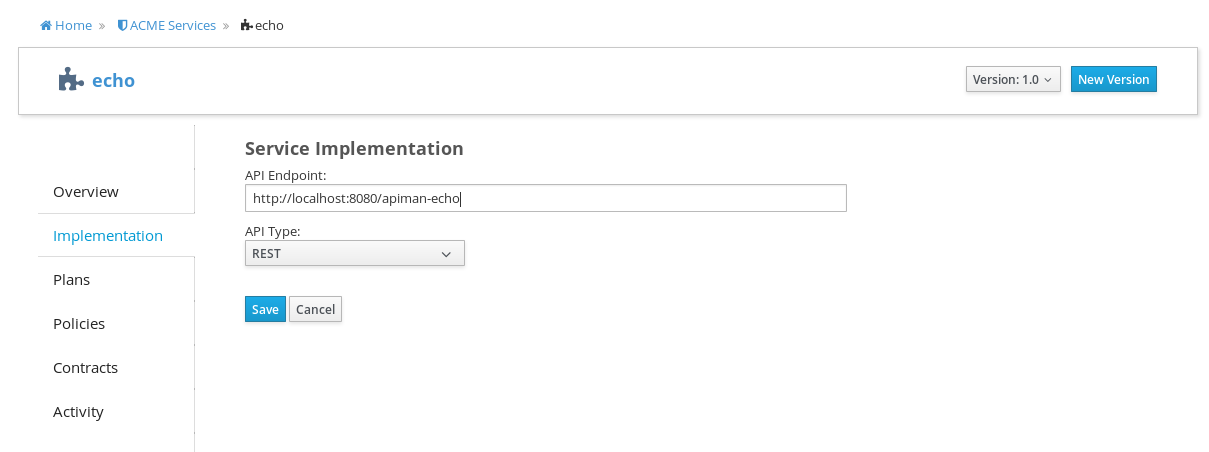
After
the service is defined, we have to define its implementation. In the
context of the API Manager, the API Endpoint is the service’s direct
URL. Remember that the API Gateway will act as a proxy for the service,
so it must know the service’s actual URL. In the case of our example
service, the URL is: http://localhost:8080/apiman-echo
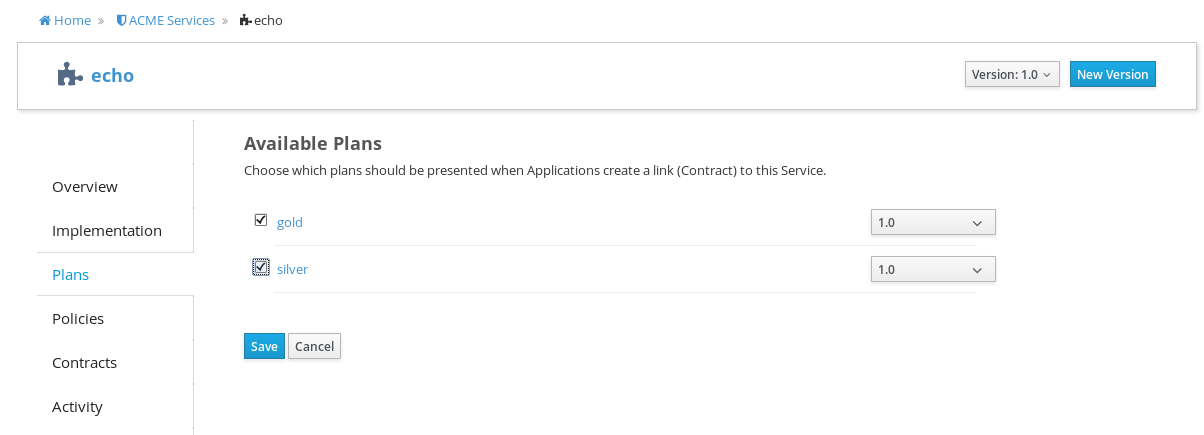
The plans tab shows which plans are available to be applied to the service:
Let’s
make our service more secure by adding an authentication policy that
will require users to login before they can access the service. Select
the Policies tab, and then define a simple authentication policy.
Remember the user name and password that you define here as we’ll need
them later on when send requests to the service.

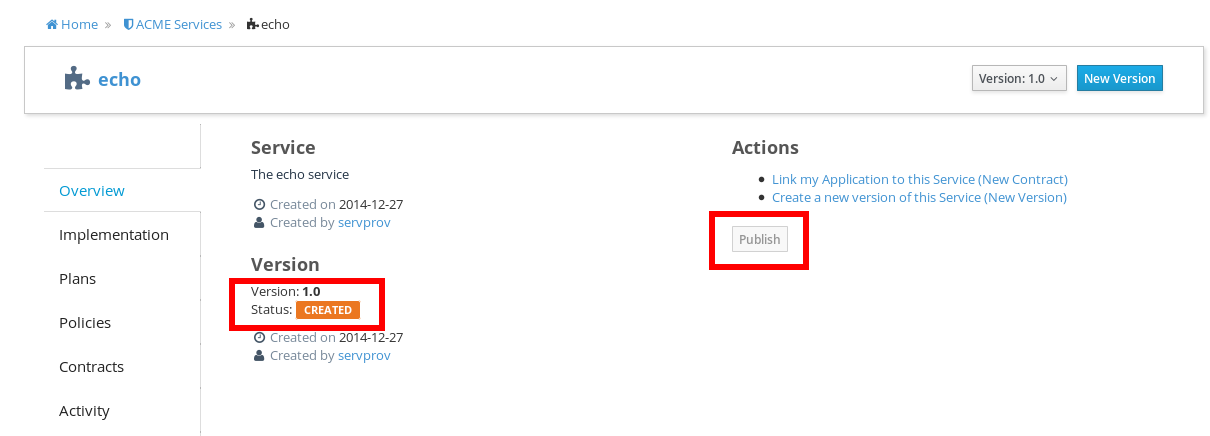
After the authentication policy is added, we can publish the service to the API Gateway:
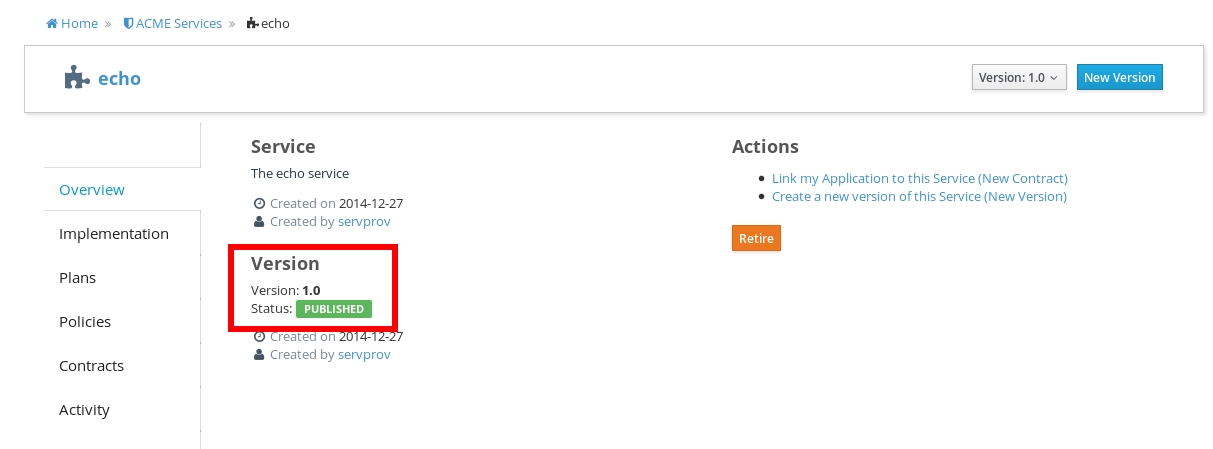
And, here it is, the published service:
OK, that finishes the definition of the service provider organization and the publication of the service.
Next,
we'll switch over to the service consumer side and create the service
consumer organization and register an application to connect to the
managed service through the proxy of the API Gateway.
The Service Consumer Organization
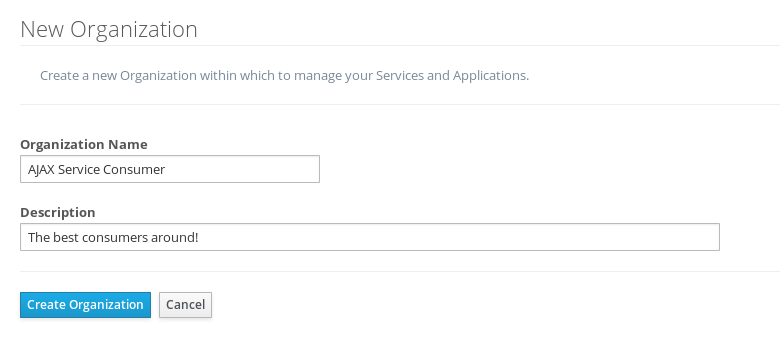
We'll
repeat the process that we used to create the application development
organization. Log in to the API Manager UI as the “appdev” user and
create the organization:
Unlike
the process we used when we created the elements used by the service
provider, the first step that we’ll take is to create a new application
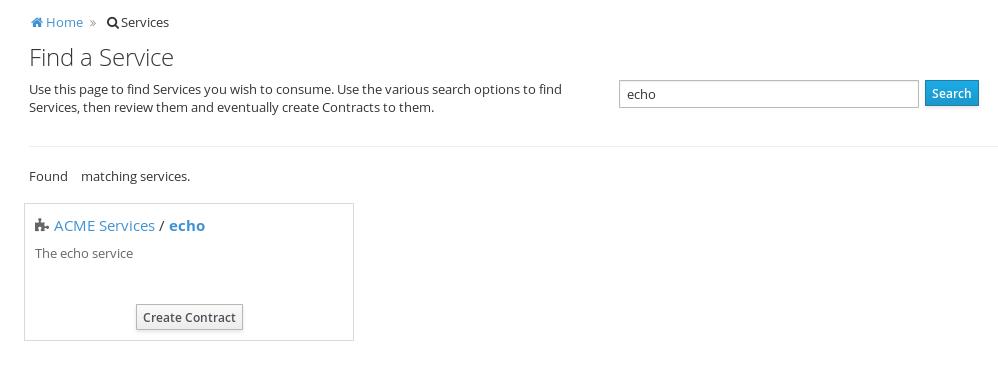
and then search for the service to be used by the application:

Searching for the service is easy, as we were careful to set the service name to something memorable:
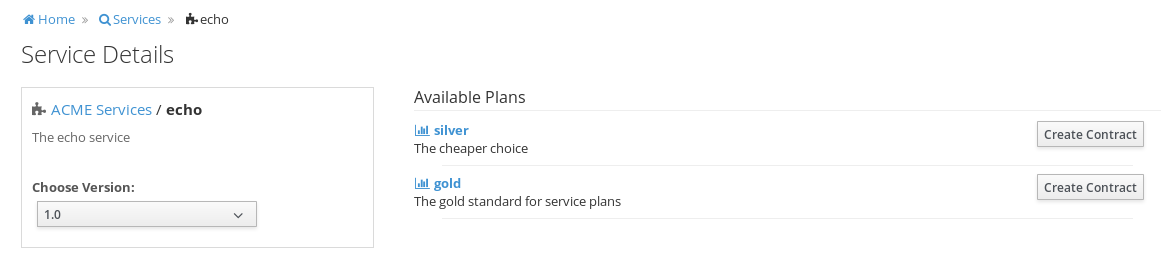
Select the service name, and then specify the plan to be used. We’ll splurge and use the gold plan:
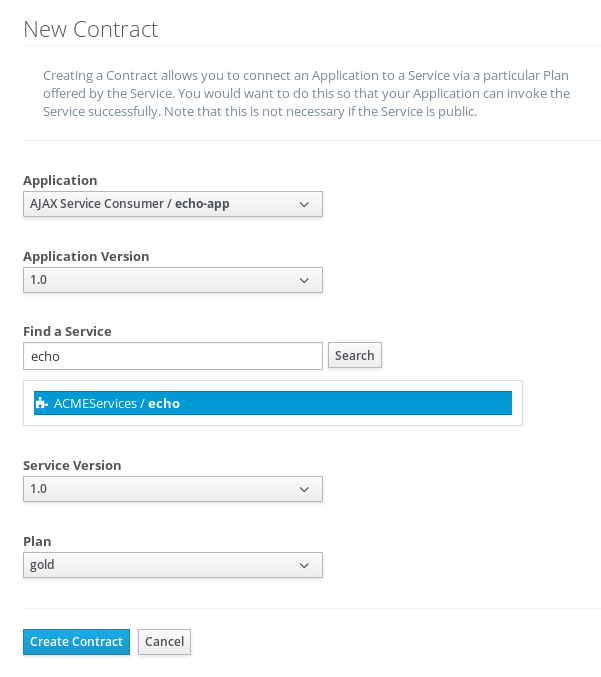
Next, select “create contract” for the plan:
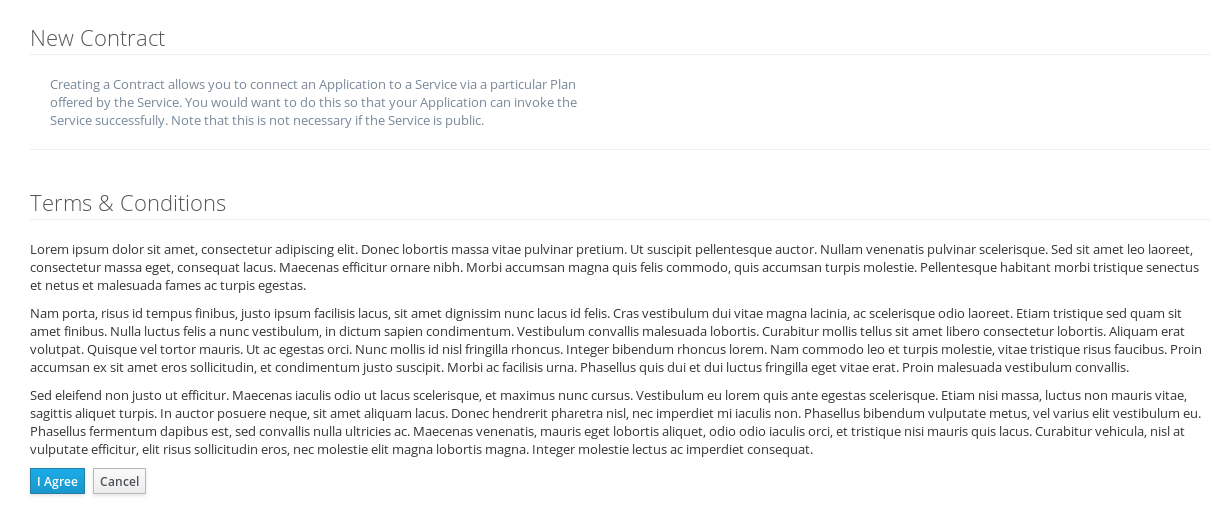
Then, agree to the contract terms (which seem to be written in a strange form of Latin in the apiman 1.0 release):
The last step is to register the application with the API Gateway so that the gateway can act as a proxy for the service:

Congratulations! All the steps necessary to provide and consume the service are complete!
There’s just one more step that we have to take in order for clients to be able access the service through the API Gateway.
Remember
the URL that we used to access the unmanaged service directly? Well,
forget it. In order to access the managed service through the API
Gateway acting as a proxy for other service we have to obtain the
managed service's URL. In the API Manager UI, head on over to the "APIs"
tab for the application, click on the the “>” character to the left
of the service name. This will expose the API Key and the service’s HTTP
endpoint in the API Gateway:

In order to be able access the service through the API Gateway, we have to provide the API Key with each request. The API Key can be provided either through an HTTP Header (X-API-Key) or a URL query parameter. Luckily,
the API Manager UI does the latter for us. Select the icon to the right
of the HTTP Endpoint and this dialog is displayed:
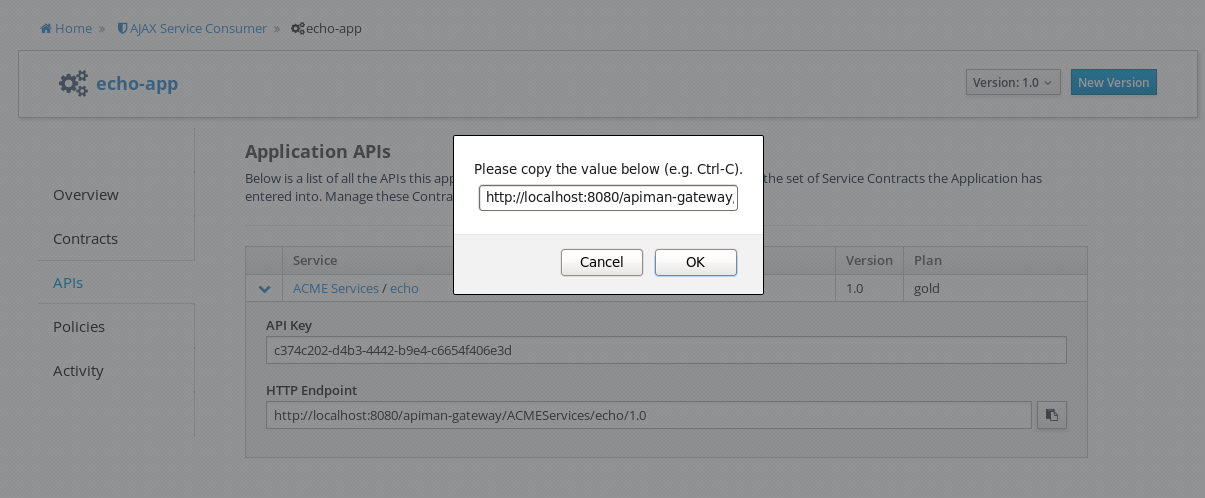
Copy
the URL into the clipboard. We’ll need to enter this into the client in
a bit. The combined API Key and HTTP endpoint should look something
like this:
Accessing the Managed Service Through the apiman API Gateway, Watching the Policies at Runtime
Thanks
for hanging in there! The set up is done. Now, we can fire up the
client and watch the policies in action as they are applied at runtime
by the API Gateway, for example:
Open the client, and enter the URL for the managed service (http://localhost:8080/apiman-gateway/ACMEServices/echo/1.0?apikey=c374c202-d4b3-4442-b9e4-c6654f406e3d)
What happens first is that the authentication policy is applied and a login dialog is then displayed:
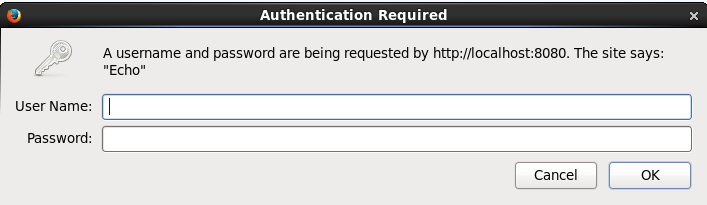
Enter
the username and password (user1/password) that we defined when we
created the authentication policy to access the service. The fact that
you are seeing this dialog confirms that you are accessing the managed
service and are not accessing the service directly.
When you send a GET request to the service, you should see a successful response:

So
far so good. Now, send 10 more requests and you will see a response
that looks like this as the gold plan rate limit is exceeded:
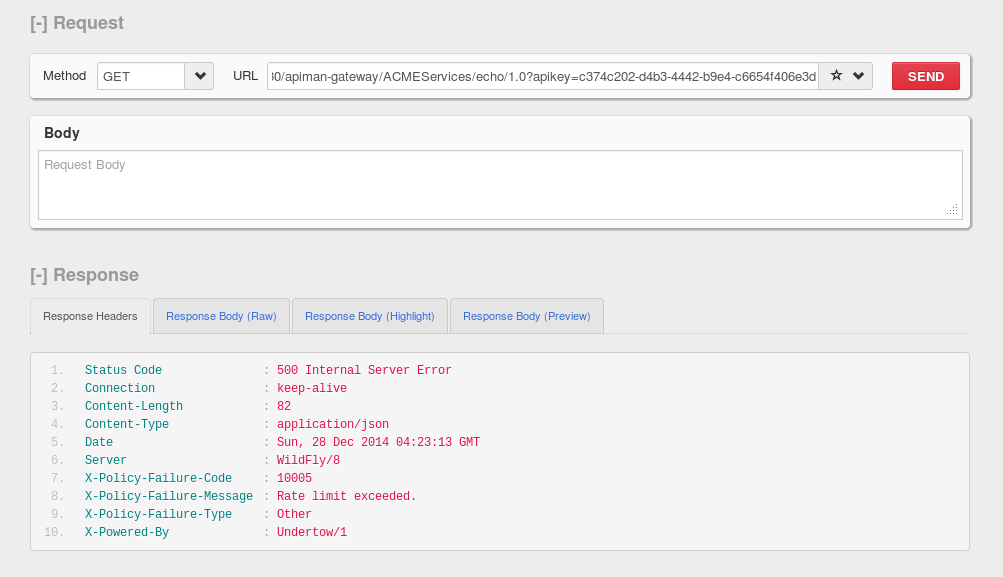
And there it is. Your gold plan has been exceeded. Maybe next time you’ll spend a little more and get the platinum plan! ;-)
Wrap-up
Let’s recap what we just accomplished in this demo:
- We installed apiman 1.0 onto a WildFly server instance.
- We used git to download and maven to build a sample REST client.
- As a service provider, we created an organization, defined policies based on service use limit rates and user authentication, and a plan, and assigned them to a service.
- As a service consumer, we searched for and found that service, and assigned it to an application.
- As a client, we accessed the service and observed how the API Gateway managed the service.
And,
if you note, in the process of doing all this, the only code that we
had to write or build was for the client. We were able to fully
configure the service, policies, plans, and the application in the API
Manager UI.
What’s Next?
In
this post, we’ve only scratched the surface of API Management with
apiman. To learn more about apiman, you can explore its website here: http://www.apiman.io/
And,
better still, get involved! Contribute bug reports or feature requests.
Write about your own experiences with apiman. Download the apiman
source code, take a look around, and contribute your own additions.
apiman 1.0 was just released, there’s no better time to join in and
contribute!
Acknowledgements
The
author would like to acknowledge Eric Wittmann for his (never
impatient) review comments and suggestions on writing this post!
Downloads Used in this Article
- REST Client (http://restclient.net/) FireFox Add-On - https://addons.mozilla.org/en-US/firefox/addon/restclient/versions/2.0.3
- Git - http://git-scm.com
References


